Owner’s manual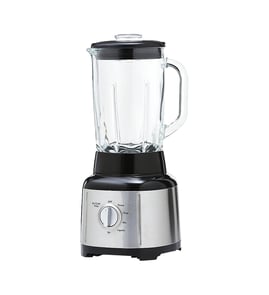


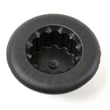

What are the blender parts called?
On the KitchenAid KSB1575TG0 5-speed blender with a 60-oz plastic jar, the main parts are typically the lid, jar, blade assembly, sealing gasket, jar base, drive coupling, and motor housing. For the exact names used for your model, match them to the exploded view in the KSB1575TG0 owner's manual.
Common part names (top to bottom)
- Lid (often called lid assembly)
- Jar (often called jar assembly)
- Blade assembly (sometimes listed as cutter or blade unit)
- Sealing gasket (seals the blade to the jar)
- Jar base (threads onto the jar and holds the blade)
- Drive coupling (connects motor drive to the jar blade)
- Motor housing (the blender base)
Model-specific examples we stock for KSB1575TG0
| What it is | How it may be listed | Example part ID |
|---|---|---|
| Drive coupling | Coupling | WPW10279256 |
| Jar | Blender jar assembly | WPW10514321 |
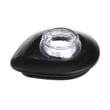
| Lid | Lid assembly | W10627846 |
How to identify the right part name fast
- Unplug the blender.
- Separate the jar from the base.
- Compare what you see to the diagram and parts list in the KSB1575TG0 owner's manual.
- Use the part name plus the part ID when ordering to avoid mix-ups.
Why it matters
Blender parts are often described by function (like “coupling” or “jar assembly”), and similar-looking pieces can fit differently. Using the KSB1575TG0 diagram helps you order the correct KitchenAid replacement part the first time.
Last updated: February 2026
What parts of the KitchenAid blender are dishwasher safe?
For the KitchenAid KSB1575TG0 blender, the jar and lid are typically dishwasher safe; the motor base is not and should only be wiped clean. For the safest, model-correct cleaning method (rack placement and heat settings), follow the KSB1575TG0 owner's manual.
What you can put in the dishwasher
In most KitchenAid blenders like the KSB1575TG0, these items are commonly dishwasher safe:
- Blender jar (60-oz plastic jar)
- Lid assembly (remove any center cap or insert, if your lid has one)
- Jar assembly components that come off for cleaning (when applicable)
What should never go in the dishwasher
These parts can trap water or contain electrical components, so we keep them out of the dishwasher:
- Motor base (controls, power cord, and drive socket area)
- Any part with wiring or switches
- Exterior housing pieces (clean by hand to protect finish and labels)
Best-practice cleaning tips (to prevent clouding and leaks)
- Place plastic jar parts on the top rack to reduce heat exposure.
- Use normal or light cycles; avoid high-heat sanitize if your plastic tends to haze.
- Rinse thick mixtures (nut butters, protein shakes) before loading.
- If you notice slipping or a burning-rubber smell, inspect the drive coupling; a worn coupling can mimic “blade” problems. The replacement is the coupling WPW10279256.
Quick reference table
| Part | Dishwasher safe? | Recommended method |
|---|---|---|
| Jar | Usually yes | Top rack, normal cycle |
| Lid | Usually yes | Top rack, remove inserts |
| Motor base | No | Unplug, wipe with damp cloth |
Why it matters
Dishwasher heat and water pressure are great for food-contact parts, but they can damage finishes and electrical components in the base. Cleaning the base by hand also helps prevent moisture from getting into the drive area and shortening motor life.
Last updated: February 2026
Why is my KitchenAid blender not working?
If your KitchenAid KSB1575TG0 blender won’t run, the most common causes are a power issue, the jar not seated correctly, an overheated motor, or a worn drive connection between the motor base and jar. We recommend checking the basics first, then inspecting the coupling and jar assembly.
Quick checks (fastest fixes first)
- Confirm the outlet works by testing a small lamp or phone charger.
- Unplug the blender for 1 minute, then plug it back in.
- Make sure the jar is fully seated on the base and the lid is installed correctly.
- If it stopped during heavy blending, let the motor cool for 10 to 15 minutes.
- Check the cord and plug for cuts, kinks, or a loose prong.
- Reduce load: add more liquid, cut ingredients smaller, and use a lower speed to start.
Parts that commonly cause a “won’t start” symptom
A blender can sound normal but not spin, or it can do nothing at all. These parts are frequent culprits on blenders like the KSB1575TG0:
| Symptom | Most likely cause | What to do |
|---|---|---|
| Motor runs but blades don’t turn | Stripped drive coupling | Inspect and replace the coupling WPW10279256 if rounded or cracked |
| Leaks, wobble, poor blending | Worn jar or drive interface | Inspect and replace the blender jar assembly WPW10514321 if damaged |
| No power, intermittent operation | Cord, switch, internal wiring, thermal protector | Follow electrical checks in the KSB1575TG0 owner’s manual |
How to inspect the drive coupling (no tools to start)
- Unplug the blender.
- Look at the rubber/plastic coupling on top of the motor base.
- If the teeth are rounded off, split, or missing, the motor can’t transfer power to the jar.
- If you smell burning rubber or see black dust, the coupling is typically slipping and worn.
Why it matters
Running a blender with a slipping coupling or overloaded jar can overheat the motor and accelerate wear on the jar drive surfaces. Fixing the drive connection early restores blending performance and helps prevent repeat shutdowns.
Last updated: February 2026
Why is my KitchenAid blender jug leaking from the bottom?
A bottom leak on your KitchenAid KSB1575TG0 blender jar almost always means the jar assembly is no longer sealing at the blade base, or liquid is wicking down the drive connection and dripping underneath. We start by checking the jar base for cracks and the drive coupling for wear, then replace the failed assembly.
Quick checks (before you buy parts)
- Unplug the blender and remove the jar from the base.
- Dry everything completely, then add water to the jar and set it on a paper towel for 5 to 10 minutes.
- Look for hairline cracks around the jar bottom and base ring.
- Check that the jar is seated flat on the base and not cross-set.
- Inspect the rubber drive coupling on the motor base for rounding, cracking, or wobble.
For model-specific diagrams and part identification, use the KSB1575TG0 owner’s manual.
Most common causes and the right fix
| What you see | Most likely cause | What we do |
|---|---|---|
| Drips start even when jar is just sitting | Jar bottom seal or blade base leak | Replace the complete jar assembly |
| Leak only while blending | Seal opens under vibration, or jar is cracked | Replace jar assembly; verify coupling condition |
| Moisture or oily residue under the base | Worn drive coupling allowing wobble and seepage | Replace the drive coupling |
Parts that commonly solve bottom leaks
- If the jar itself is leaking at the blade base, replace the blender jar assembly WPW10514321.
- If the jar is fine but the drive connection is worn, replace the coupling WPW10279256.
Why it matters
A leaking jar can let liquid reach the motor drive area, which accelerates coupling wear and can lead to slipping, burning smells, or intermittent operation. Fixing the seal early protects the motor base and keeps blending performance consistent.
After the repair: prevent repeat leaks
- Do not overfill; leave headspace for circulation.
- Start on a low speed, then increase to reduce sudden pressure at the seal.
- Avoid blending very hot liquids unless your recipe and jar are intended for it.
- Hand-wash and fully dry the jar base area before storage.
Last updated: February 2026