
How old is my KitchenAid by serial number?
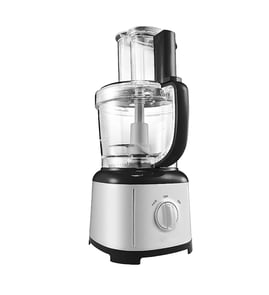
For a KitchenAid KFP0719CU0 food processor, the most reliable way to estimate age from the serial number is to match the serial format to KitchenAid’s date-coding pattern (plant code plus a year and week or similar). Once you identify the year and production week, you can convert that to an approximate manufacture date.
Most KitchenAid food processors place the model and serial label on the underside of the base or on the rear/bottom area of the motor housing.
- Unplug the food processor before handling it
- Look for a sticker or metal tag with MODEL: KFP0719CU0
- Write down the full serial number exactly as shown
- Take a clear photo in case characters are hard to read
- Keep the serial number with your purchase records for future parts lookups
KitchenAid serial numbers commonly include a plant identifier plus a date code. Many formats use a year indicator and a week-of-year indicator, which together point to when the unit was built.
| What you see in the serial | What it usually means | What you can do with it |
|---|---|---|
| Letters at the start | Manufacturing plant code | Helps confirm the serial format |
| A single year character | Production year indicator | Narrow to a specific year cycle |
| Two digits after that | Production week | Estimate the month of manufacture |
Serial decoding can be tricky because formats vary by product line and era.
- Do not use stand mixer-only decoding rules for a food processor
- If your serial includes a week number (01 to 52), use that with the year code
- If your unit is older, some codes repeat on long cycles; use other clues to confirm
- Cross-check with your purchase date, warranty paperwork, or retailer receipt
- If you need parts, match by model number first, then confirm fit by serial if required
Knowing the approximate manufacture date helps us narrow down the correct KitchenAid parts and revisions for your KFP0719CU0, especially for items that can change over time like the food processor bowl lid W11551396 or food processor multi-purpose blade W11239491.
Last updated: January 2026
What is the life expectancy of a food processor?
A KitchenAid food processor like model KFP0719CU0 typically lasts 7 to 10 years with normal home use. With good cleaning habits and avoiding overloads, many units run 10+ years; heavy daily use usually shortens life.
| Use pattern | Typical life expectancy | What usually wears first |
|---|---|---|
| Light (1 to 2 times/week) | 10 to 15 years | Bowl/lid tabs, pusher fit, blade dulling |
| Moderate (3 to 5 times/week) | 7 to 10 years | Lid interlock wear, bowl/lid cracking, blade dulling |
| Heavy (daily, dense dough often) | 5 to 7 years | Motor strain, drive coupling wear, bowl/lid damage |
- Motor bogs down on normal loads (slicing disc or multi-purpose blade work).
- Burning smell, excessive heat, or intermittent power.
- Bowl or lid no longer locks securely (safety interlock issues).
- Cracks, leaks, or wobble in the bowl or lid.
- Poor results from worn cutting edges (more tearing than slicing).
Many “worn out” food processors are really dealing with worn accessories. For KFP0719CU0, common replaceable items include:
- Food processor bowl lid W11551396
- Bowl W11319163
- Food processor multi-purpose blade W11239491
- Blade, dough W11319166
A food processor’s motor can last a long time, but cracked bowls, worn lid locks, and dull blades reduce performance and can prevent safe operation. Replacing the right KitchenAid parts often restores normal chopping, slicing, and dough mixing without replacing the whole unit.
Last updated: January 2026
Can you replace food processor blades?
Yes. On the KitchenAid KFP0719CU0 food processor, the cutting blades and discs are designed to be removable accessories, so replacing a dull, bent, or chipped blade is the right fix for poor chopping, uneven slicing, or extra strain on the motor.
Common replaceable cutting accessories for this model include:
- The main chopping blade: food processor multi-purpose blade W11239491
- The dough blade: blade, dough W11319166
- Slicing and shredding style discs (if yours is damaged or warped)
- The disc shaft adapter (if discs wobble or do not seat correctly): food processor disc shaft adapter W11239489
Replace the blade if you notice any of these issues:
- Nicks, chips, or visible bends in the metal
- Cracking or damage around the center hub where it mounts
- Food tearing or bruising instead of clean cutting
- Excess vibration, rattling, or wobble during use
- Rust spots that do not clean off completely
Use this checklist to avoid buying the wrong accessory.
| What to match | What to look for | Why it matters |
|---|---|---|
| Model number | KFP0719CU0 | Ensures the blade fits the bowl and drive hub |
| Part ID | Example: W11239491 | Confirms the exact replacement accessory |
| Symptom | Dull cuts vs wobble | Points to blade vs adapter vs bowl/lid issue |
A damaged or dull blade can overload the drive system, increase vibration, and reduce food quality. Replacing the correct blade restores performance and helps protect the bowl, lid, and motor from unnecessary stress.
Last updated: January 2026
What should you not put in a food processor?
For the KitchenAid KFP0719CU0 food processor, avoid foods that can crack the bowl or lid, seize the blade, or overload the motor. In general, skip very hard, very hot, or very liquid-heavy items, and use the correct attachments so you do not damage the bowl, lid, or blade.
- Hot liquids or hot soups: heat and steam can warp plastic and force liquid out of the lid; use a blender after cooling.
- Large hard items (whole bones, fruit pits, very hard rinds): can chip or crack the bowl and dull the blade.
- Rock-hard frozen foods (solid blocks of frozen meat or fruit): can stall the motor; thaw slightly and cut into small pieces.
- Excessive liquid (smoothies, thin batters): food processors do not handle high liquid volume well; use a blender.
- Very tough grinding jobs (whole spices, coffee beans): can overwork the motor; use a spice grinder.
- Sticky, heavy dough beyond typical home batches: can strain the drive system; use a stand mixer for large batches.
Use the right part for the job and keep loads reasonable.
- For chopping and pureeing, use the food processor multi-purpose blade W11239491.
- For slicing, use the disc, slicing W11319164 with the correct adapter.
- Do not force food through the feed tube; use the food processor pusher assembly W11569314 to guide food steadily.
- If the lid does not lock easily, stop and realign it; forcing can crack the food processor bowl lid W11551396.
| Food/task | OK in a food processor? | Better tool |
|---|---|---|
| Cooled soup (small amount) | Sometimes | Blender |
| Whole bones or pits | No | Knife, cleaver |
| Solid frozen blocks | No | Thaw, then process |
| Coffee beans, whole spices | No | Grinder |
| Standard pizza dough batch | Yes (with dough blade) | Stand mixer for large batches |
Avoiding hard, hot, and overly liquid foods helps protect the motor and prevents cracking the bowl or lid. It also keeps cutting edges sharper longer, so slicing and chopping stay consistent.
Last updated: January 2026